

DeskViewer: How I Created And Debugged A Remote Desktop Application
Get to know how one can make their own remote desktop controlling application along with some advanced debugging tactics


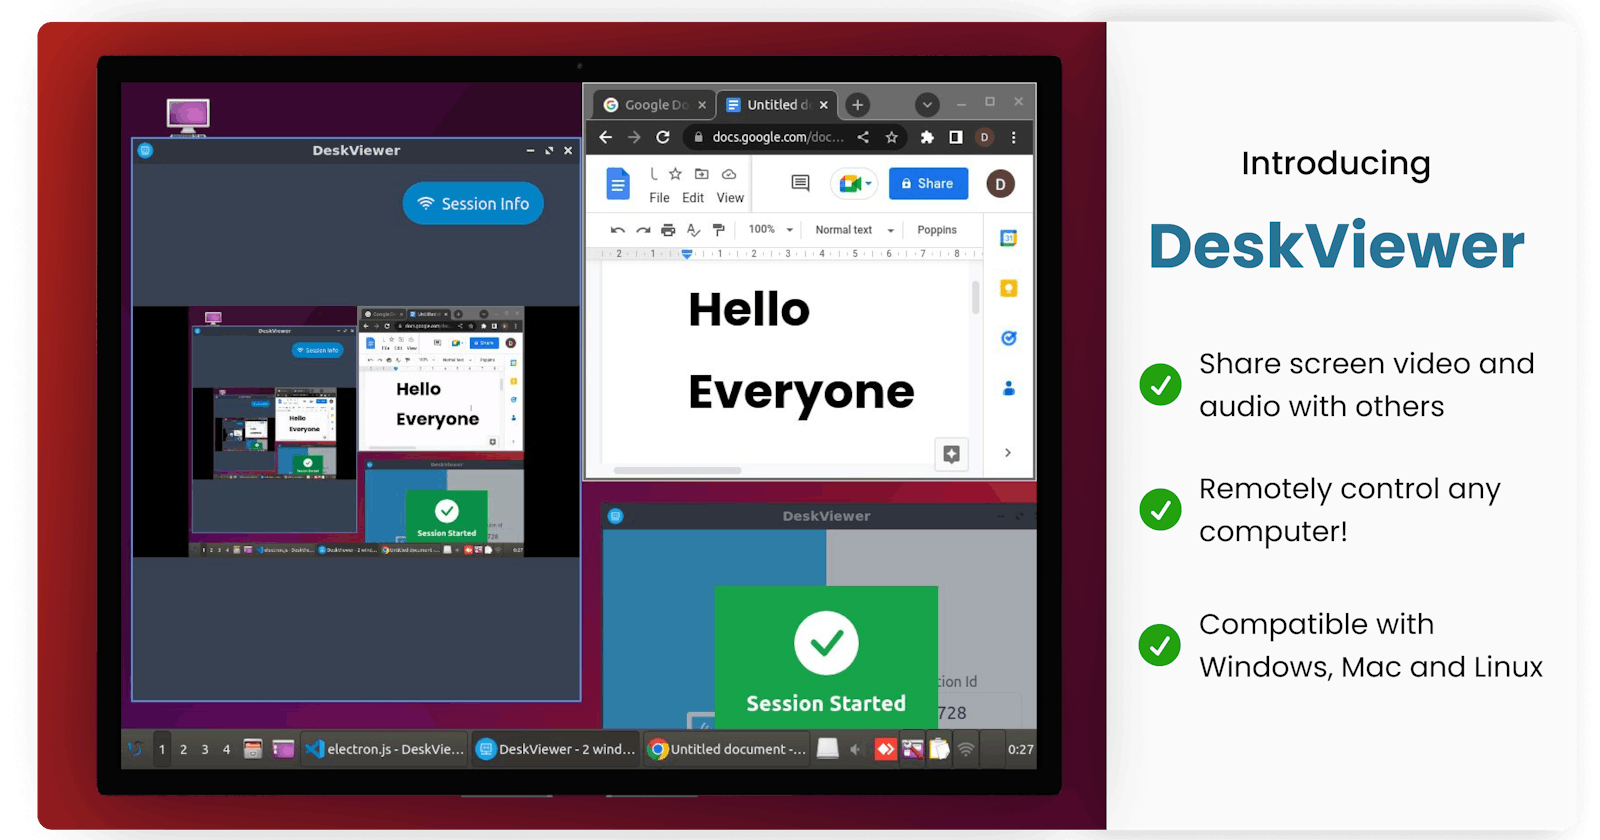
Yesterday I finished creating another project called DeskViewer. It is a cross-platform desktop app that allows users to access and control a remote computer from anywhere in the world
And believe me, this was among the most challenging projects I've ever built. I faced many difficult bugs related to screen sharing, web socket communication, executable building etc and got to learn a lot from this! Therefore, I decided to share my journey with you :)
In this article, I will share
How you can create your own remote desktop controlling application like Microsoft Teams or AnyDesk
How I solved the 5 most difficult bugs when creating this project (Also mentioning what all things worked and what did not)
About DeskViewer 💻
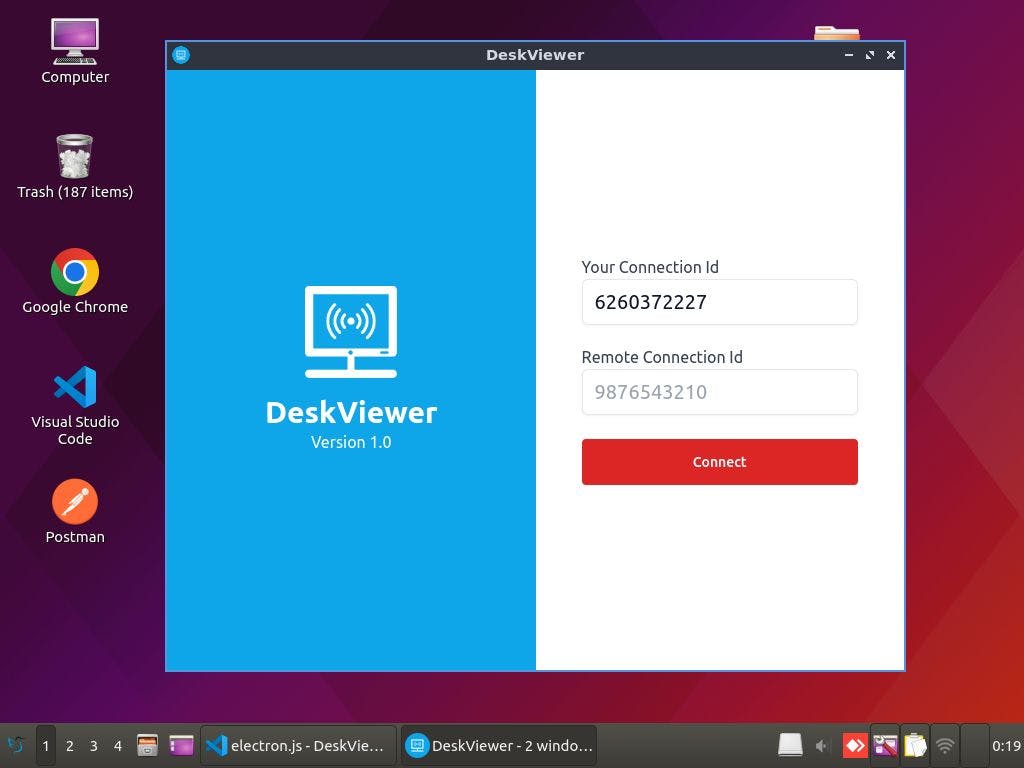
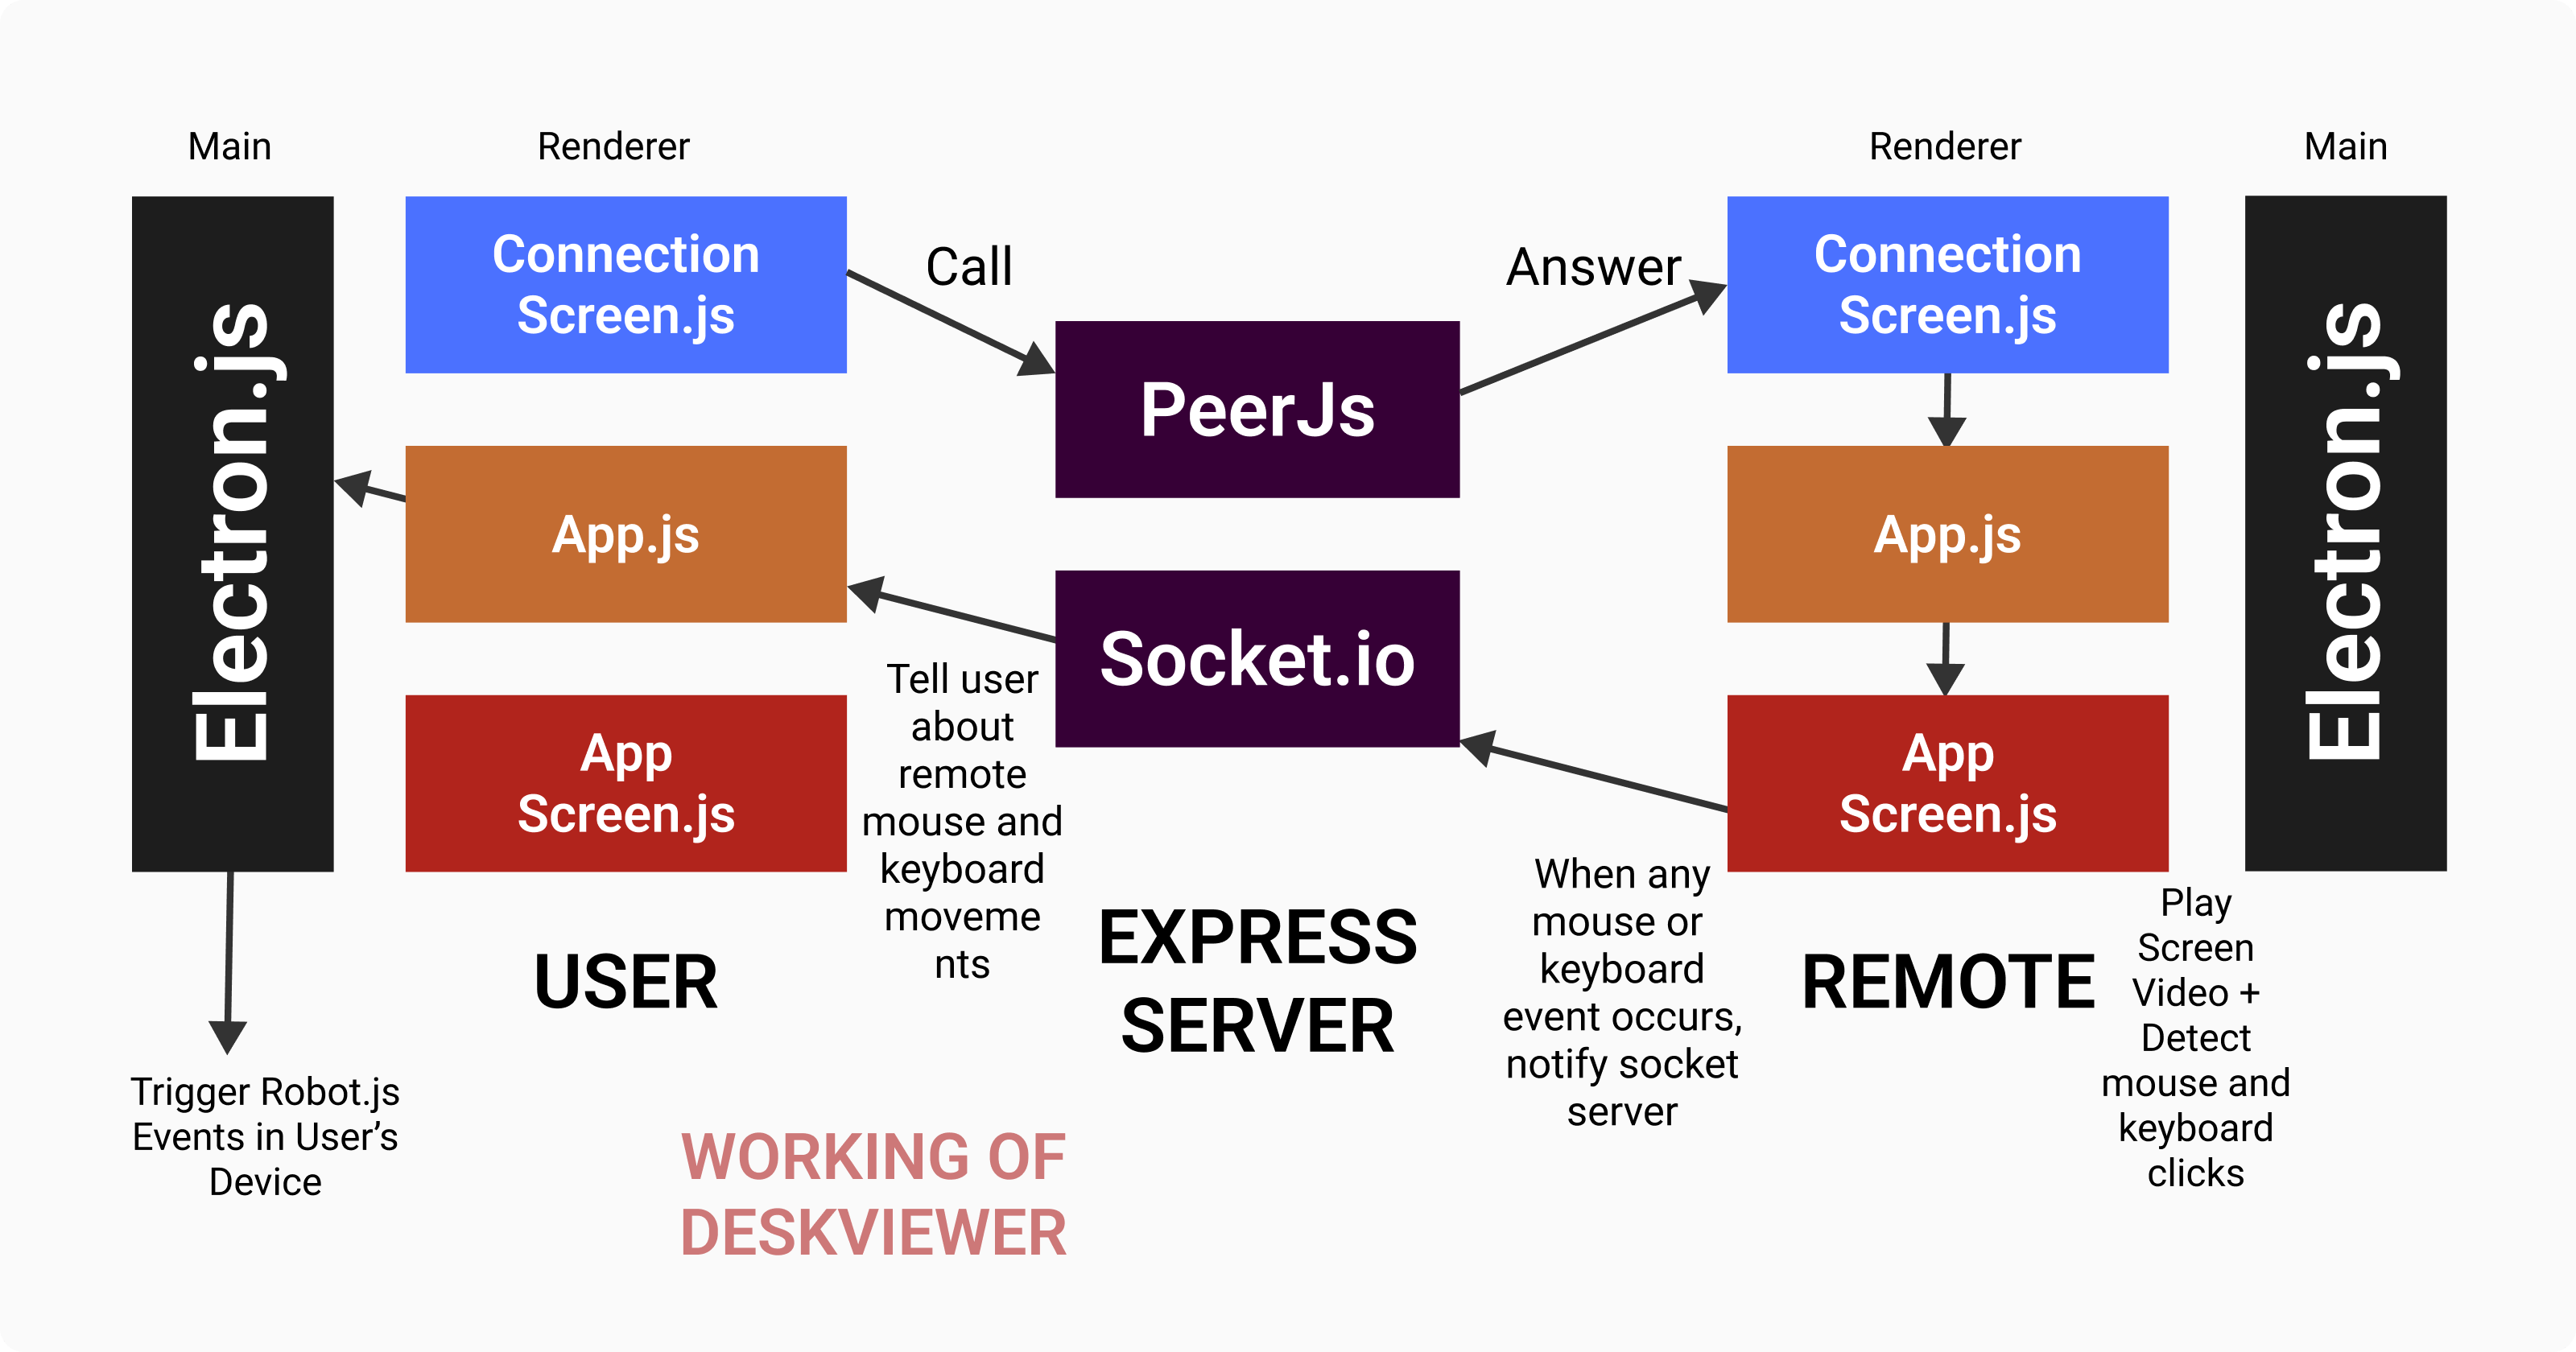
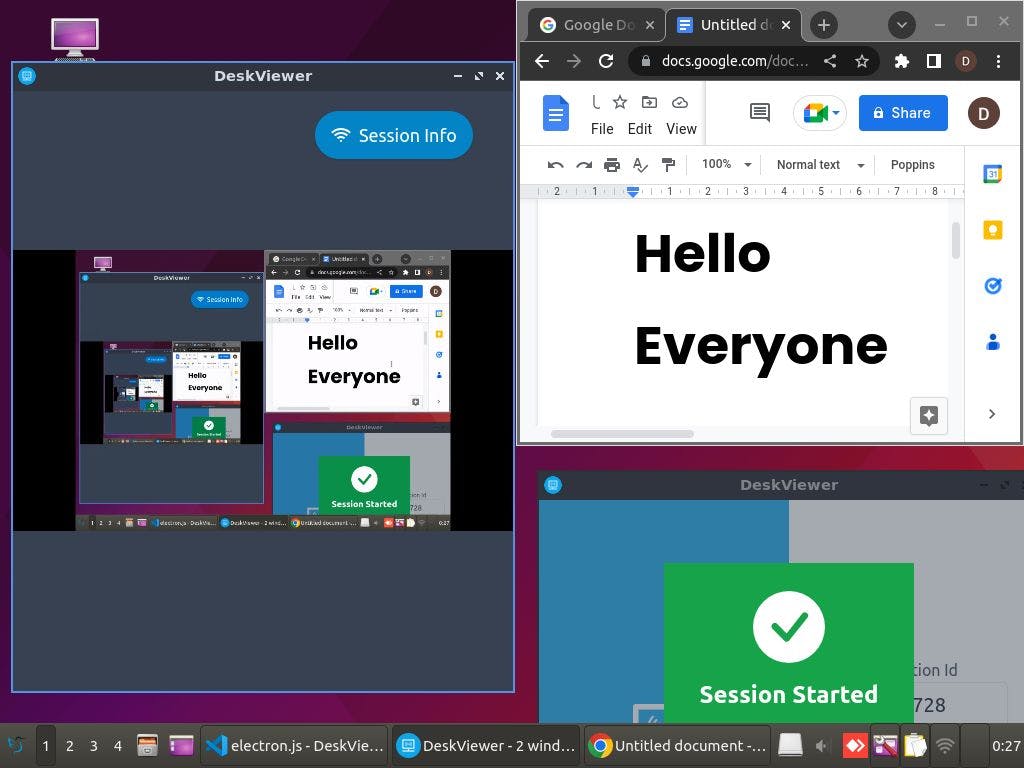
DeskViewer is a desktop application where you can enter the remote device's connection id and connect to that device via a peer-to-peer (P2P) connection
Once the connection establishes, you will start receiving the screen video and audio of the remote device on your computer. And once you start moving your mouse or pressing keystrokes on your keyboard, the changes will automatically be reflected in the remote's computer
As a result, you can easily control your friend's computer and help him troubleshoot any errors, debug his code, design a graphic etc
Technical Details 📓
DeskViewer is built using the following technologies:
Electron - For accessing desktop resources and building the executable file
PeerJs - For transmitting screen content in real-time
Socket.io - For transmitting keyboard and mouse events
RobotJs - For triggering the keystrokes and mouse events on the remote device
NodeJs - For creating a custom peer server along with web sockets
React - For reusing design components
Redux Toolkit - For handling the react states
TailwindCSS - For designing the user interface
Resources 🔗
If you want to learn more about DeskViewer, you can refer to the links below:
Video Introduction: https://www.youtube.com/watch?v=OgqYnuOS-W0
GitHub Repository: https://github.com/ishantchauhan710/DeskViewer
Creating A Remote Desktop Application 💥
It took me over 30+ hours to create DeskViewer so it is not possible to explain everything in detail in a single article. However, I will share the roadmap and all the steps you can follow to be able to create your own version of Microsoft Teams of Anydesk :)
But do remember that creating your own remote desktop controlling application requires a good knowledge of javascript, electron, node, web sockets and react. So if you are following through this section, I expect you to have a basic understanding of these frameworks. You can drop me a message on my instagram anytime for any questions :)
Step 1: Setup an electron app with react
In electrons, we have 2 processes named main and renderer. The main process is responsible for dealing with system resources where as the renderer process is responsible for rendering the frontend layout.
So to set up react with electron, in terminal write npx create-react-app deskviewer. Once the project initializes, go to the public folder and create a file named electron.js
The file named electron.js will act as our main process where as the react project's index.html file in the public folder will act as a renderer process. In electron.js, write:
let win;
function createWindow() {
  win = new BrowserWindow({
    width: 600,
    height: 600,
    autoHideMenuBar: true,
    webPreferences: {
      nodeIntegration: true, // To access node modules like fs & path
      contextIsolation: false,
    },
  });

// React project running port
win.loadURL("http://localhost:3000")
}

// Create a desktop window using react code
app.whenReady().then(createWindow);
Now to connect electron with react, open the package.json file and add the following lines above your scripts:
"name": "deskviewer",
"productName": "DeskViewer",
"main": "public/electron.js",
Finally, write npm start to run the react code and then in another terminal, write npx electronmon . to start the electron app
Step 2: Setup Peer Connection
We want to share our screen with the remote user. If we use the client-server approach where we take a screenshot and send it to the server which then returns it to the client, this will result in slow performance and consume a high amount of bandwidth. Therefore we need to implement a peer-to-peer approach where both browsers will be able to exchange data in realtime
One way to do it is to use WebRTC but setting up WebRTC is quite complex where you need to set up SDP connections, ICE candidates, instantiate STUN server etc. Therefore an easy way to do it is to use a library called peerjs which provides an abstraction over WebRTC
To setup peerjs, in the terminal write npm install peerjs and then in your react project's App.js, write:
const [peerId, setPeerId] = useState("");
const [remotePeerId, setRemotePeerId] = useState("");

// For accessing peer variable outside useEffect()
const peerInstance = useRef(null);

 // Make call
  const shareScreen = (remoteId) => {
    // Get our screen content
    navigator.mediaDevices
      .getDisplayMedia({ video: true, audio: false })
      .then((mediaStream) => {
        // Make a Peerjs call and pass our screen video with it
        const call = peerInstance.current.call(remotePeerId, mediaStream);

// When remote accepts our call, play his stream in our video view
 call.on("stream", function (remoteStream) {
            remoteVideoView.current.srcObject = remoteStream;
            remoteVideoView.current.play();
          });
      });
  };


 useEffect(() => {
    // Create peerjs object
    const peer = new Peer();

    // When user opens browser get his auto generated peer id
    peer.on("open", (id) => {
      setPeerId(id);
    });

    // Receive call
    peer.on("call", (call) => {

      // Get monitor screen content (Since peerjs can't take blank stream)
      navigator.mediaDevices
        .getDisplayMedia({ video: true, audio: false })
        .then((mediaStream) => {
          // Answer call with our screen video
          call.answer(mediaStream);
        });
    });

    peerInstance.current = peer;
  }, []);
navigator.mediaDevices.getDisplayMedia() is used to get the screen content of a device where as you can use navigator.mediaDevices.getUserMedia() to access the webcam and microphone
In DeskViewer, only one user shares the screen and the receiving user can see his screen. So there is only a one-way flow of data which is not possible in peerjs. Therefore, you need to make a call with the screen data of both users!
Step 3: Setup Mouse And Keyboard Listeners
Now that we can share our screen, let's now add event listeners for all mouse and keyboard events. Whenever a remote user presses any keyboard or mouse button, a javascript listener will detect it and tell it to a node server which in return will notify the client in real-time using web sockets.
So, create a new folder called server. There, open a terminal and write npm init -y and npm install express socket.io. Then create a file server.js and write:
const express = require("express");
const app = express();
const socketIo = require("socket.io");
const server = require("http").createServer(app);

// Initialize websockets
const io = socketIo(server, {
  cors: {
    origin: "*",
  },
});

// When websocket connection starts
io.on("connection", function (socket) {

  // When a user from frontend sends request to our server
  socket.on("join", function (data) {
    console.log("User joined " + data);
    // Create a room for client
    socket.join(data);
  });

  // When mousemove event is recieved from a user
  socket.on("mousemove", ({ userId, remoteId, event }) => {
    // We update the remote user about it
    io.to("User" + remoteId).emit("mousemove", event);
  });

}

server.listen(5000, () => {
  console.log("Server started");
});
Use node server.js command to start this server. Now our backend is ready to process web socket events. So, in App.js file, write::
const socket = io("http://127.0.0.1:5000");
let mousePos = null;
// Whenever user moves cursor, save its coordinates in a variable
document.addEventListener("mousemove", (e) => {
     mousePos = e;
});

// Every 100ms delay, share coordinates with connected user
setInterval(() => {
    if (mousePos) {
    // Sending mousemove event with remote id and mouse coordinates to server
      socket.emit("mousemove", {
         userId: userId,
         remoteId: remoteId,
         event: { x: mousePos.pageX, y: mousePos.pageY },
        });
       }
      }, 100);
And finally to receive those events, in App.js, write:
  socket.on("mousemove", (event) => {
      console.log(`Mousemove: x=${event.x} y=${event.y}`);
    });
Now, run this code in 2 different browser tabs. When you start using your cursor in one tab, you will see the mouse coordinates in the console tab of the second browser :)
Step 4: Screen Sharing On Electron
Understand that it is not possible to share the screen using navigator.mediaDevices when using electron since it handles screen sharing differently. To achieve screen sharing in electron, we need to use desktopCapturer which is a method provided by electron framework to access screen content. So in your electron.js file, change code to:
const { desktopCapturer } = require("electron");

let win;
function createWindow() {
  win = new BrowserWindow({
    width: 600,
    height: 600,
    icon: __dirname + "/img/deskviewer_logo_256.png",
    autoHideMenuBar: true,
    webPreferences: {
      nodeIntegration: true,
      contextIsolation: false,
    },
  });

  win.loadURL("http://localhost:3000")
    .then(() => {
      console.log("Window loaded, URL: " + win.webContents.getURL());
      desktopCapturer
        .getSources({ types: ["screen"] })
        .then(async (sources) => {
          for (const source of sources) {
            // Add if condition for multiple screen sources
            console.log("Sources available: " + source.id);
            console.log("Source id sent: " + source.id);
            win.webContents.send("SET_SOURCE", source.id);
          }
        });
    });
}

app.whenReady().then(createWindow);
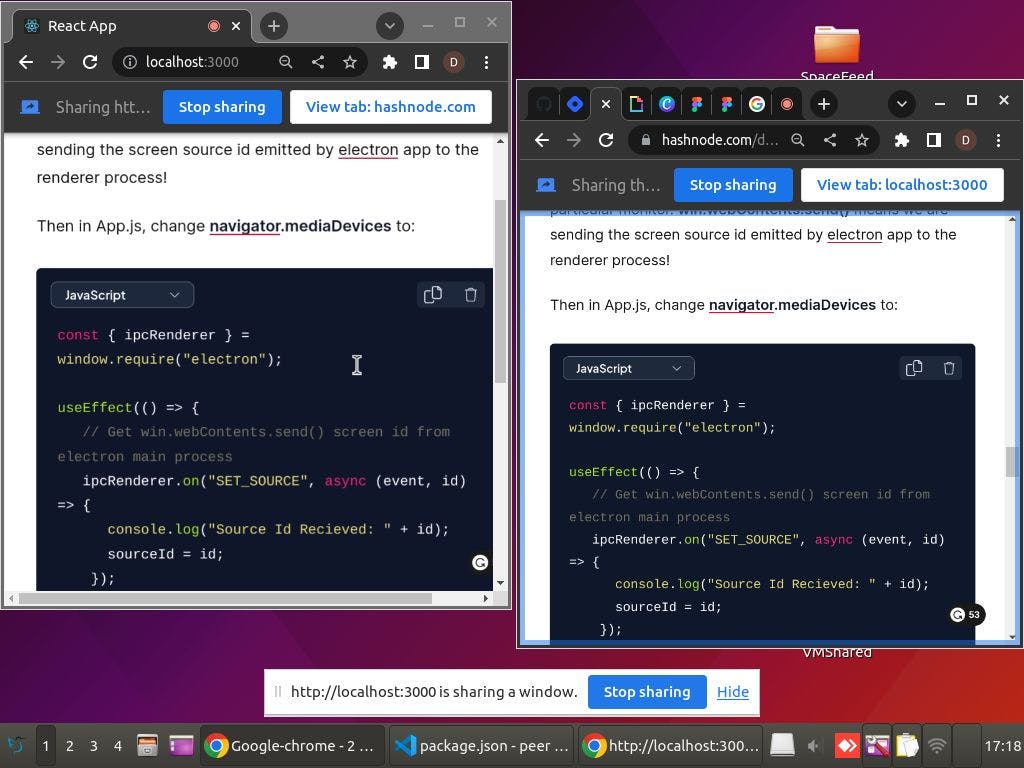
This code detects all the monitors of a user and shares the last one of them. You can add an if condition to specify a particular monitor. win.webContents.send() means we are sending the screen source id emitted by electron app to the renderer process!
Then in App.js, change navigator.mediaDevices to:
const { ipcRenderer } = window.require("electron");

useEffect(() => {
   // Get win.webContents.send() screen id from electron main process
   ipcRenderer.on("SET_SOURCE", async (event, id) => {
      console.log("Source Id Recieved: " + id);
      sourceId = id;
    });
},[])

// Use that screen id to share screen
navigator.mediaDevices
          .getUserMedia({
            audio: false,
            video: {
              mandatory: {
                chromeMediaSource: "desktop",
                chromeMediaSourceId: sourceId,
                minWidth: 1280,
                maxWidth: 1280,
                minHeight: 720,
                maxHeight: 720,
              },
            },
          })
We have just customised our code a bit to make it compatible with electron framework! Run npx electronmon . command in two different terminals to test screen sharing in 2 desktop applications!
Step 5: Controlling Remote Device

When we receive mousemouse command from the remote using web sockets, we want to automatically move our mouse. Web browsers don't allow programs to access system resources like a mouse and keyboard but since we are using electron, we can easily do it using a library called robotjs which automatically triggers mouse and keyboard events on a machine. For that, in terminal, write npm install robotjs. Then in App.js, add the following line below console.log() statement:
  socket.on("mousemove", (event) => {
      console.log(`Mousemove: x=${event.x} y=${event.y}`);
      ipcRenderer.send("mousemove", event);
    });
In electron, to send a message from the main process to the renderer process, we use win.webContents.send(). But to send a message from renderer to main process, we use ipcRenderer.send() method
Now in electron.js file,
const robot = require("robotjs");
ipcMain.on("mousemove", (event, args) => {
  console.log(`Mousemove: x=${args.x} y=${args.y}`);
  robot.moveMouseSmooth(args.x, args.y);
});
It's time to run the application! I highly recommend you test this app on a virtual machine or any other device because if you run 2 application windows together on the same device, you won't be able to control your mouse or keyboard. Save the file and run the code using npx electronmon . command! Once you run this command, you will be able to control the remote device's cursor and keyboard :)
Solving The 5 Most Difficult Bugs 🕷️
If you are thinking about creating a similar app, I highly recommend you go through this section as well. This is because I faced some really difficult errors due to outdated documentations and dependency compatibility-related issues
#1 PeerJs Websocket Connection Failed
When working with peerjs, sometimes the screen sharing didn't work. In the console tab, it showed web socket connection failed
What Didn't Work
Clearing browser cache and restarting react
Changing my wifi connection
What Worked
When you create a peerjs instance using const peer = new Peer(), the peerjs library uses a default public peer server for communication. Sometimes this server becomes slow and causes errors in your app. Therefore, you can create your own peer server in nodejs:
const express = require("express");
const app = express();
const ExpressPeerServer = require("peer").ExpressPeerServer;
app.use(
  "/peerjs",
  ExpressPeerServer(server, {
    debug: true,
  })
);
server.listen(5000, () => {
  console.log("Server started");
});
And in react's App.js, you can connect with it using:
 const peerOptions = {
      host: "127.0.0.1",
      port: 5000,
      path: "/peerjs",
      config: {
        iceServers: [
          { url: "stun:stun01.sipphone.com" },
          { url: "stun:stun.ekiga.net" },
          { url: "stun:stunserver.org" },
          { url: "stun:stun.softjoys.com" },
          { url: "stun:stun.voiparound.com" },
          { url: "stun:stun.voipbuster.com" },
          { url: "stun:stun.voipstunt.com" },
          { url: "stun:stun.voxgratia.org" },
          { url: "stun:stun.xten.com" },
          {
            url: "turn:192.158.29.39:3478?transport=udp",
            credential: "JZEOEt2V3Qb0y27GRntt2u2PAYA=",
            username: "28224511:1379330808",
          },
          {
            url: "turn:192.158.29.39:3478?transport=tcp",
            credential: "JZEOEt2V3Qb0y27GRntt2u2PAYA=",
            username: "28224511:1379330808",
          },
        ],
      },
    };

const peer = new Peer(uid,peerOptions);
#2 DOM Exception: Not Supported
Once I implemented screen sharing in the browser, it was time to test it using the electron framework. But once I did that, I saw a blank screen with the error message saying DOM Exception: Not Supported.
What Didn't Work
Commenting different segments of code to find the origin of the error
Replacing <video /> tag with <video><source/><video /> tag
What Worked
After spending an hour on this issue, I started looking for examples of screen sharing in electron on github. Then I came to know that we can't share screen in electron apps using the native browser way and we need to use the desktopCapturer method
#3 Module "fs" Is Not Defined

Once I implemented desktopCapturer, I got this error which took another 1 hour of me :(
What Didn't Work
Degrading create-react-app version from v5 to v4
Overriding react web pack configurations using react-app-rewired or craco
Ejecting react app using npm run eject and manually configuring babel and webpack files
What Worked
Electron uses the fs module which stands for file system. It is a nodejs module used to access device's file system. Since react works on the browser and not on an OS, I had to make some changes in electron and react code to be able to use desktopCapturer. These changes were:
// electron.js
let win;
function createWindow() {
  win = new BrowserWindow({
    width: 600,
    height: 600,
    icon: __dirname + "/img/deskviewer_logo_256.png",
    autoHideMenuBar: true,
    webPreferences: {
      nodeIntegration: true, // ADDING THIS LINE TO ENABLE FS SUPPORT
      contextIsolation: false, // TO USE ELECTRON METHODS IN APP.JS
    },
  });
}
And in App.js, changing require() to window.require() i.e
const { ipcRenderer } = window.require("electron");
#4 RobotJs Node Version Build Error
Unfortunately, the developers of robotjs are no longer maintaining it so with the new node and react updates, the number of errors are also increasing. When trying to create an executable file of my project, I got an error of robotjs node version
What Didn't Work
Changing NodeJs version and reinstalling RobotJs
Removing the node_modules folder and reinstalling packages
What Worked
It was really strange that robotjs worked fine in development but caused bugs in production. I was about to replace it with some other automation library however, luckily I found the solution under the issues section of robotjs library :)
Electron requires rebuilding the older node packages. So I had to install another library called electron-builder and then make the following changes in my package.json file:
"rebuild-robotjs": "electron-rebuild -f -w robotjs"
And then running npm run rebuild-robotjs and npm run build fixed the bugs!
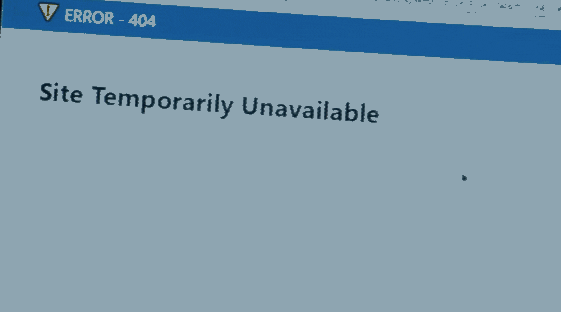
#5 Application Error 404
Finally when I finished creating this app, when I built the linux executable file to test it, I saw a blank screen showing a 404 Application Error which was strange because my app worked fine in development mode
What Didn't Work
Changing the version of react-router-dom
Adding "homepage" : "." in package.json file
Inspecting the sources tab to see if my scripts and stylesheets were being loaded in the production build or not
What Worked
Luckily I came to know that in react we use <BrowserRouter> which detects url endpoints and returns the corresponding screen component. However, in electron, we don't have any browser urls. All we have is an index.html file so we need to use a special router called <HashRouter> from the react-router-dom library to detect endpoints!
What Next?
This article was my third submission for #DebuggingFeb 2023. If you have not read my previous articles, you can find their links below where I have shared lots of useful stuff about debugging frontend, backend, android, performance and security-related bugs :)
Thanks 😇
I would like to thank Hashnode for providing such an awesome platform to share your thoughts and ideas. I hope this article would have given you an idea of how you can make your own remote desktop-controlling applications. If you have any questions, let me know in the comment section or drop me a message on my instagram or linkedin :)